
Display a raster layer from GRIDit in QGIS
You can use the Web Map Service (WMS) API in GRIDit to display a raster image in QGIS (support is limited to raster files).
How to display GRIDit raster layers in QGIS
In order to be able to import the WMS service into QGIS these steps need to be taken:
1. Get the URL from GRIDit
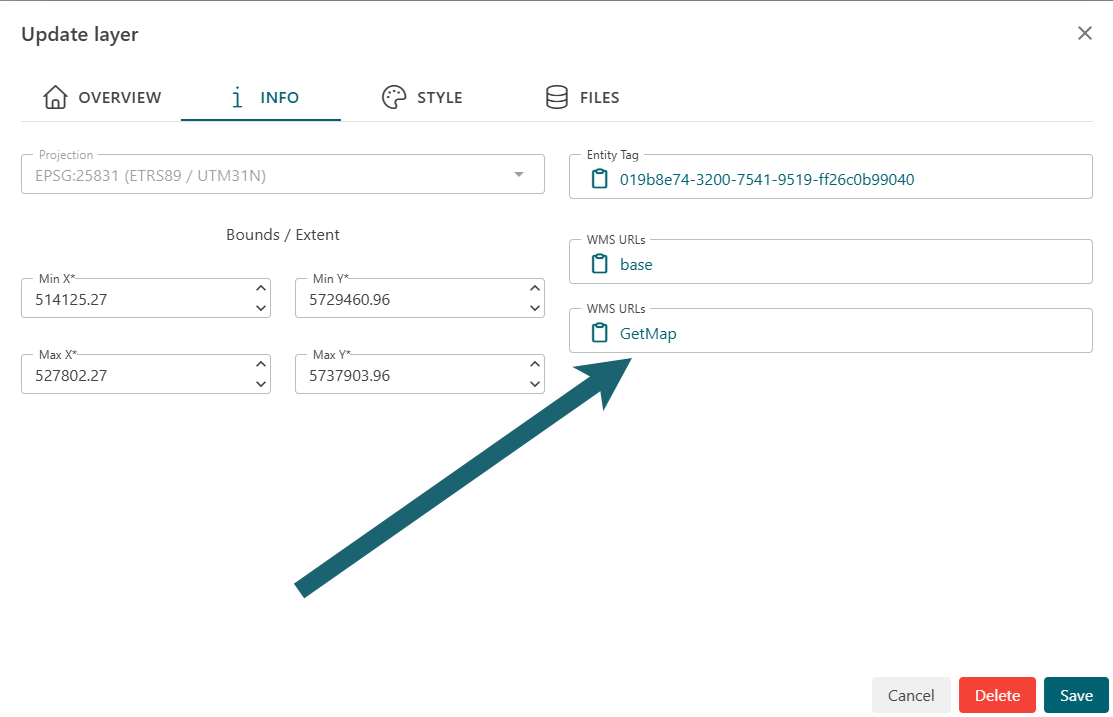
This looks like this:
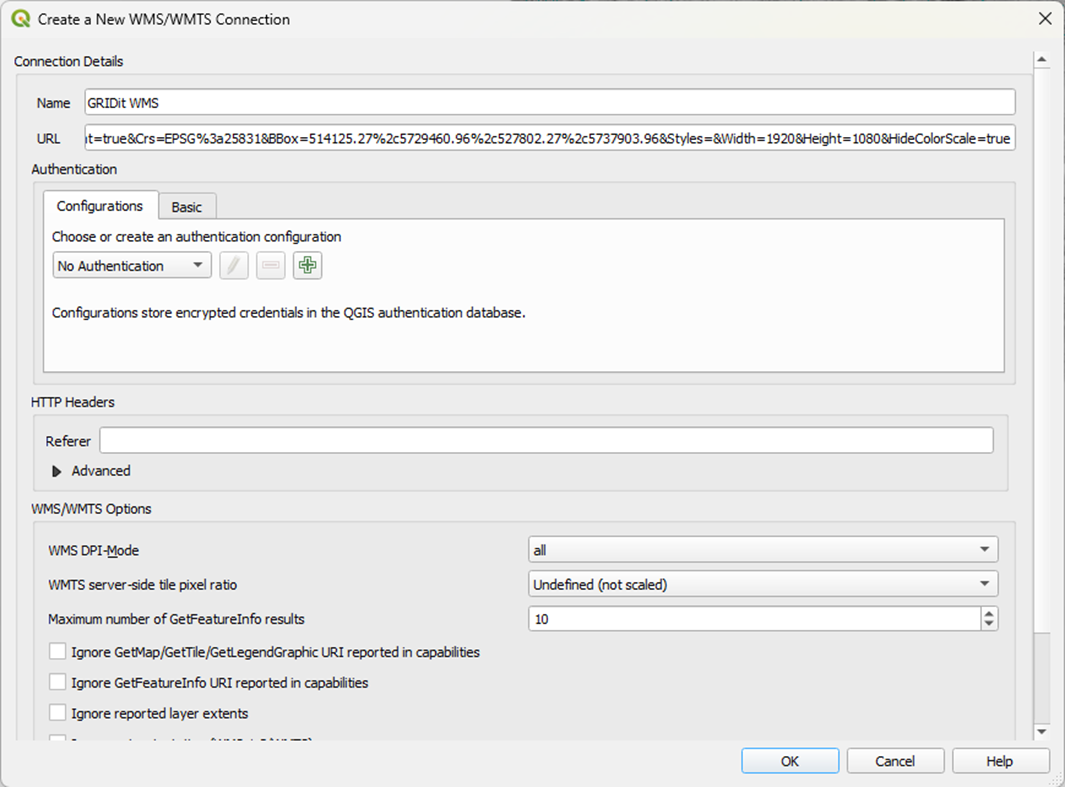
2. Create a new WMS in QGIS
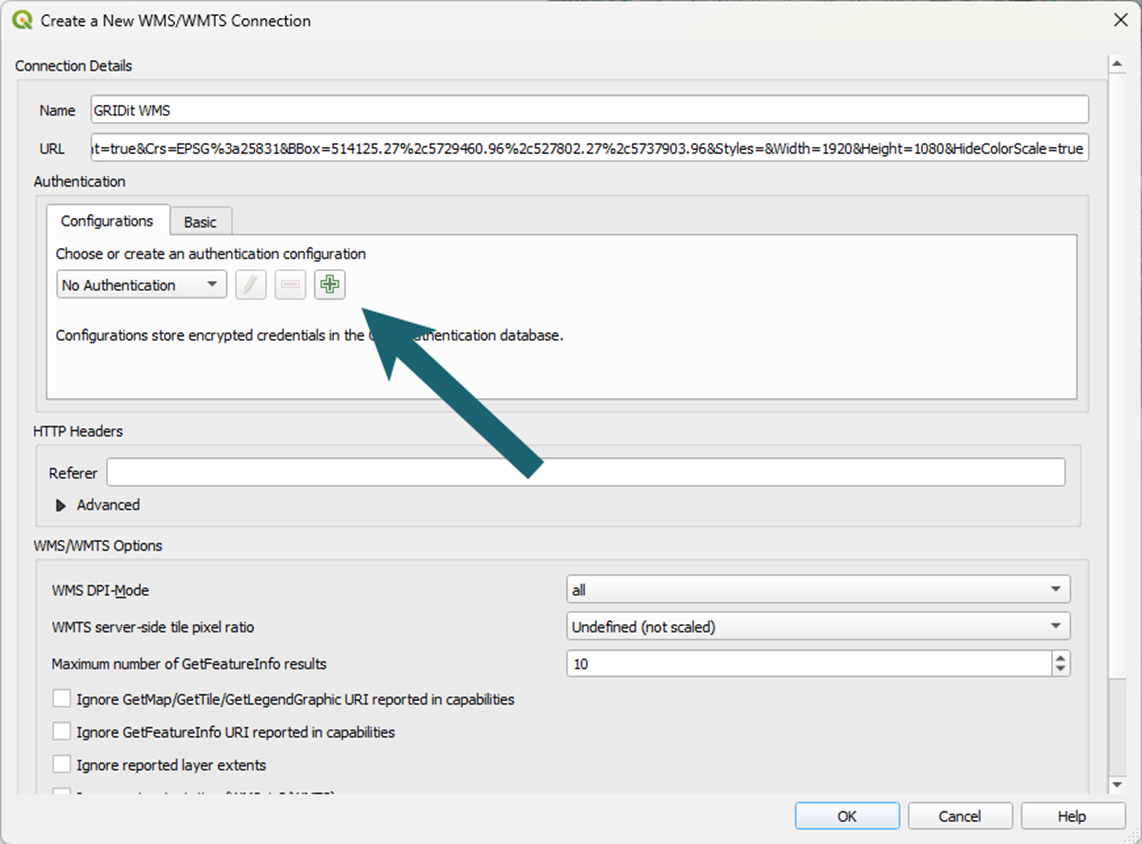
give it a name and paste the URL in the field URL:
3. Get user authentication key from GRIDit
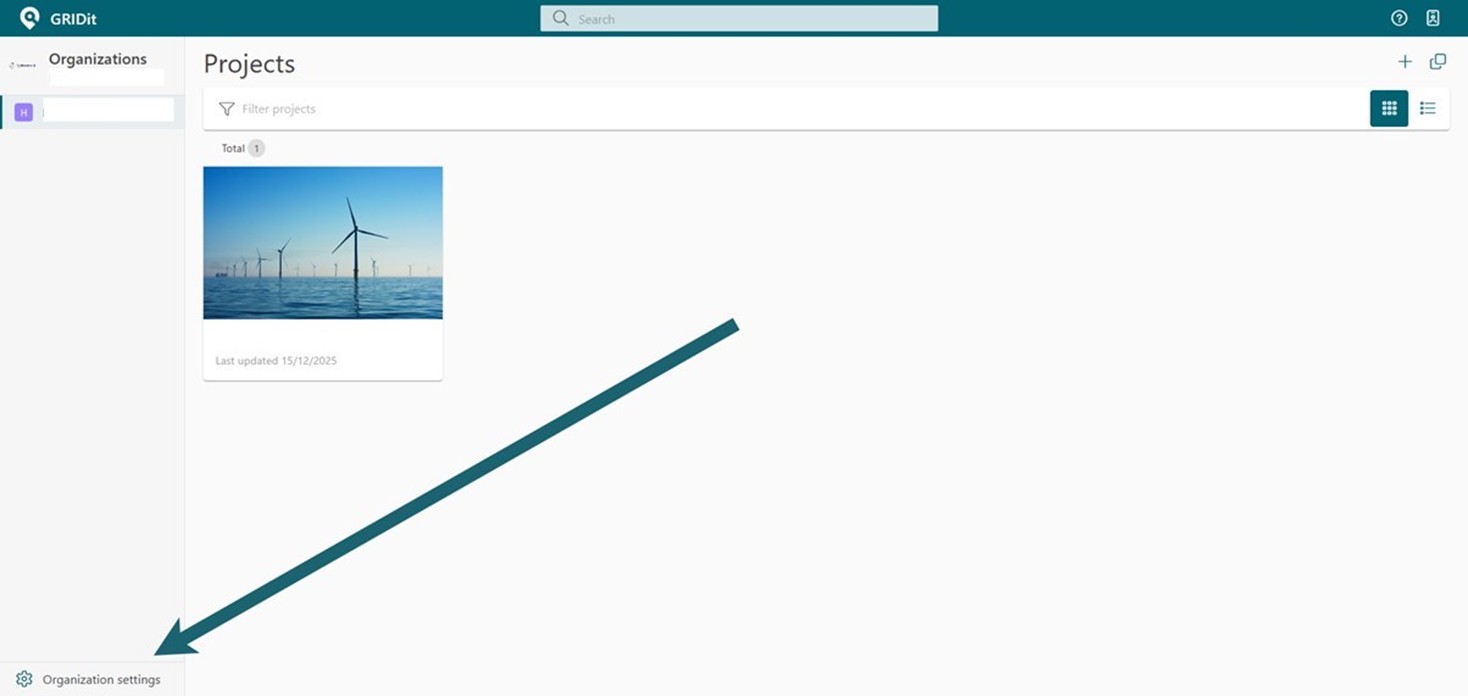
In GRIDit and open the ‘Organization Settings’:
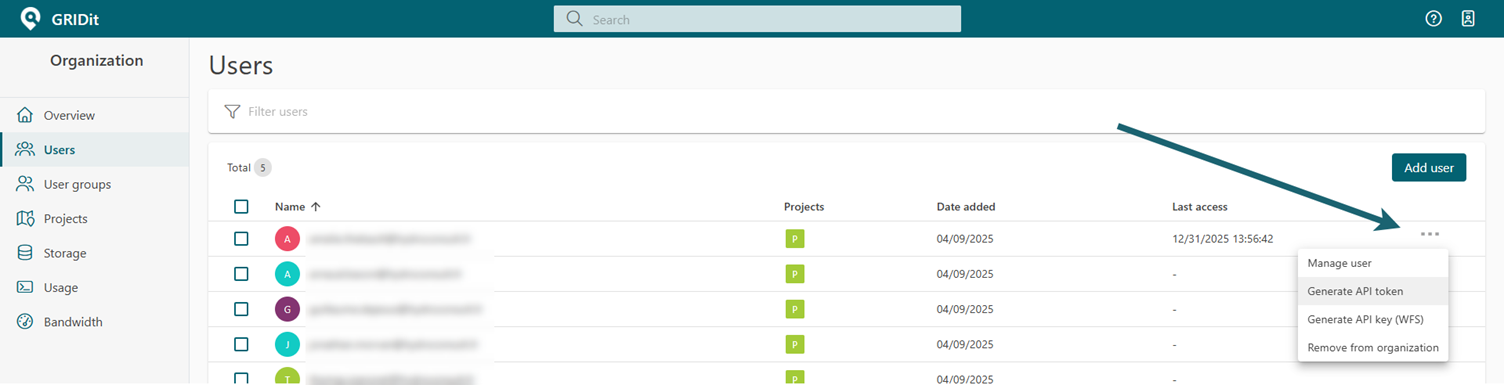
Click on ‘Users’ and find your email address which gives you access to GRIDit.4. On the far right click the 3 dots and select ‘Generate API Key’ and copy it:
4. Create a new connection in QGIS
In QGIS click the + to open the authentication:
Again click on the + and enter the header key (X-API-Key) and the API key itself copied from GRIDit into ‘Header value’:
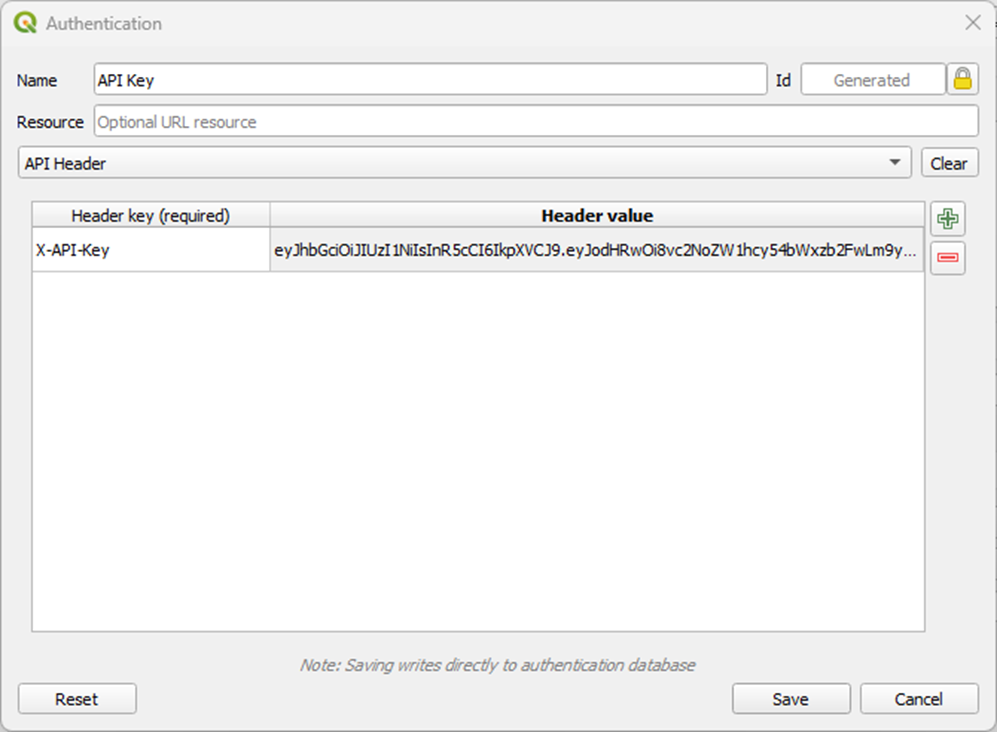
Then click ‘Save’ and in the next screen ‘OK’.
The raster layers should now be available in QGIS.