# Display a raster layer from GRIDit in QGIS
You can use the [Web Map Service (WMS) API](https://wiki.app.gridit.nl/books/gridit-user-manual/page/wfs-wms-external-applications "GRIDit User Manual - WFS & WMS APIs (opens in new window)") in GRID*it* to display a raster image in QGIS (support is limited to raster files).
#### How to display GRID*it* raster layers in QGIS
---
In order to be able to import the WMS service into QGIS these steps need to be taken:
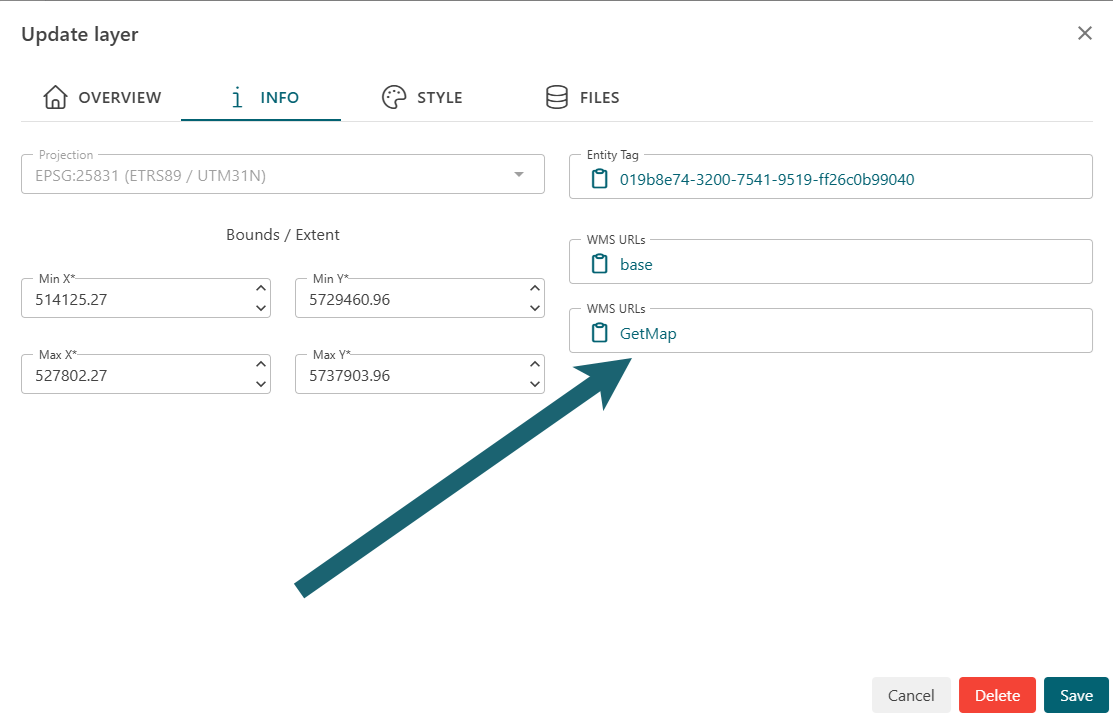
1. Get the URL from GRIDit
[](https://wiki.app.gridit.nl/uploads/images/gallery/2026-03/step1.png)
This looks like this:
*[https://api.gridit.nl/api/projects/5d031bb9-4a90-4679-b157-43af165b1614/layers/WMS?Service=WMS&Version=1.3.0&Request=GetMap&Layers=019b8e74-3200-7541-9519-ff26c0b99040&Format=image%2fpng&Transparent=true&Crs=EPSG%3a25831&BBox=514125.27%2c5729460.96%2c527802.27%2c5732653.96&Styles=&Width=1920&Height=1080&HideColorScale=true](https://api.gridit.nl/api/projects/5d031bb9-4a90-4679-b157-43af165b1614/layers/WMS?Service=WMS&Version=1.3.0&Request=GetMap&Layers=019b8e74-3200-7541-9519-ff26c0b99040&Format=image%2fpng&Transparent=true&Crs=EPSG%3a25831&BBox=514125.27%2c5729460.96%2c527802.27%2c5732653.96&Styles=&Width=1920&Height=1080&HideColorScale=true)*
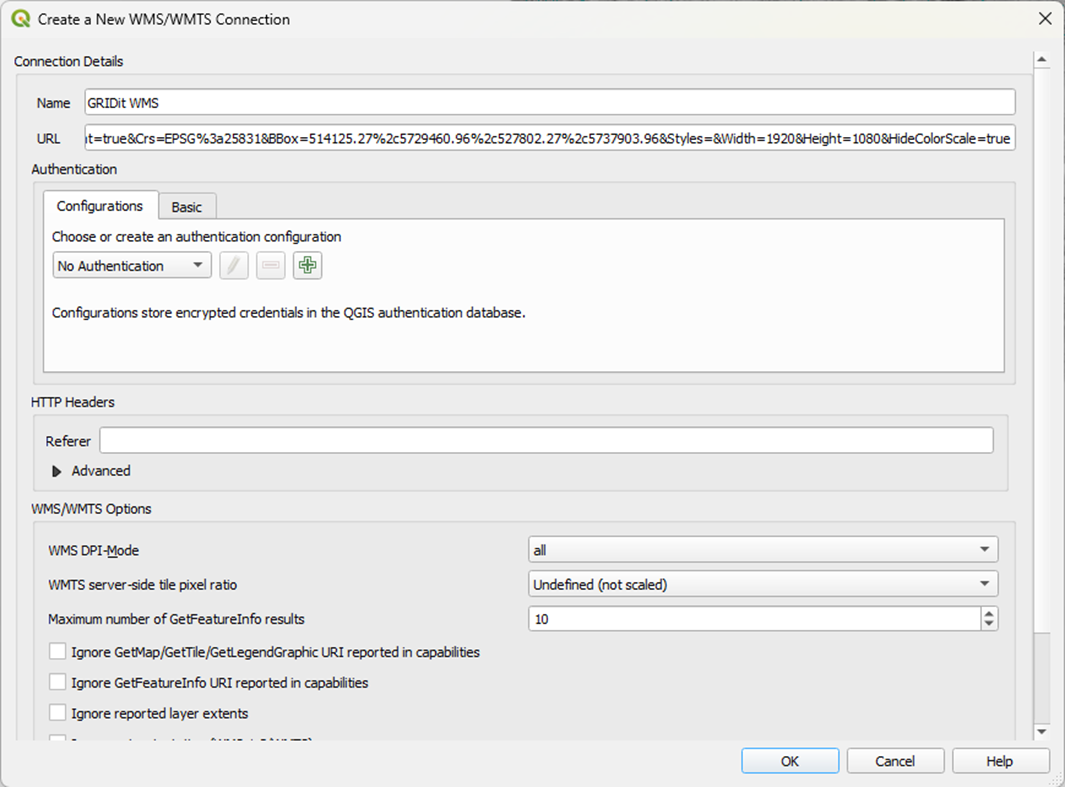
2. Create a new WMS in QGIS
Give it a name and paste the URL in the field URL:
[](https://wiki.app.gridit.nl/uploads/images/gallery/2026-03/step2.png)
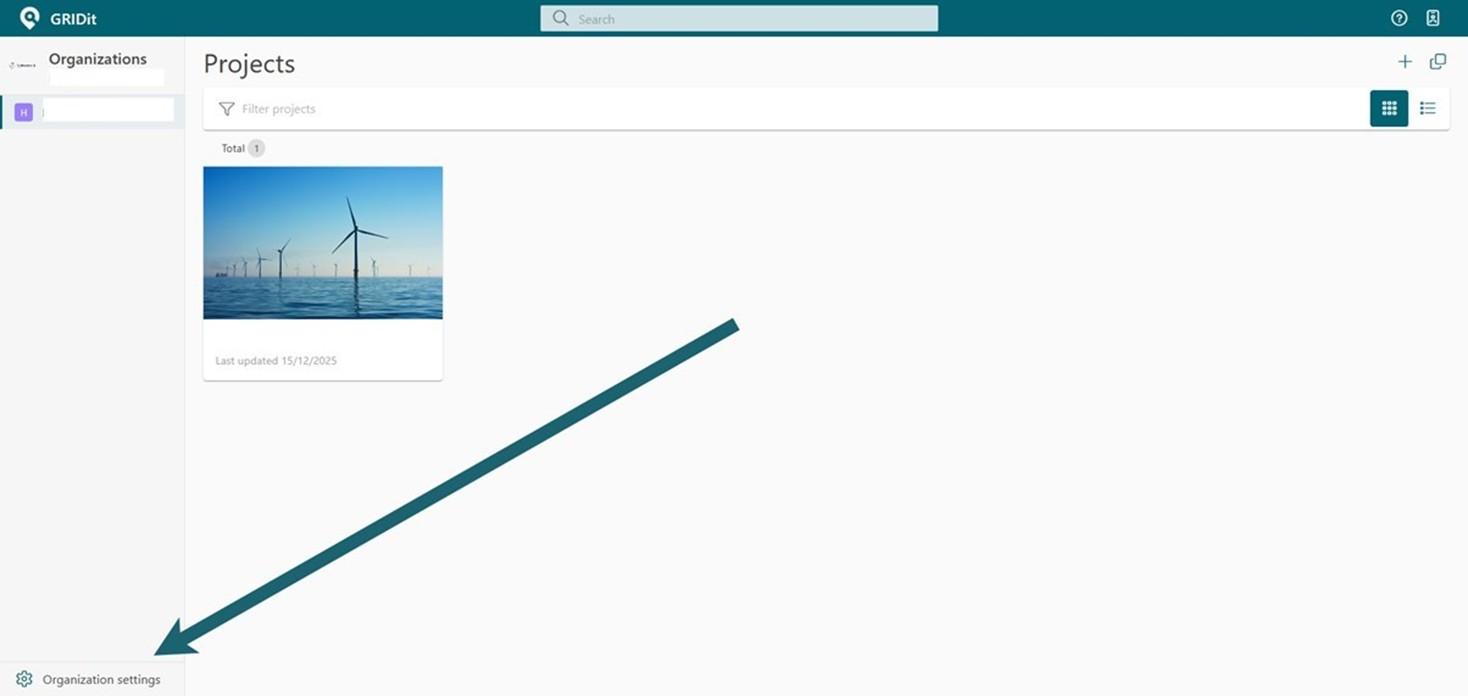
3. Get user authentication key from GRIDit
In GRID*it* and open the ‘Organization Settings’:
[](https://wiki.app.gridit.nl/uploads/images/gallery/2026-03/step3.jpg)
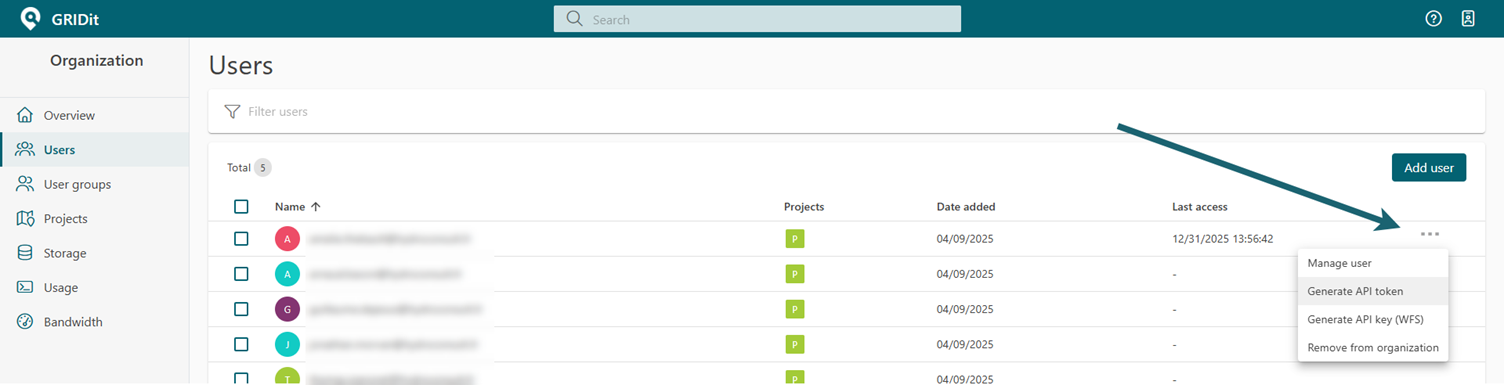
Click on ‘Users’ and find your email address which gives you access to GRID*it*.4. On the far right click the 3 dots and select ‘Generate API Key’ and copy it:
[](https://wiki.app.gridit.nl/uploads/images/gallery/2026-03/step4.png)
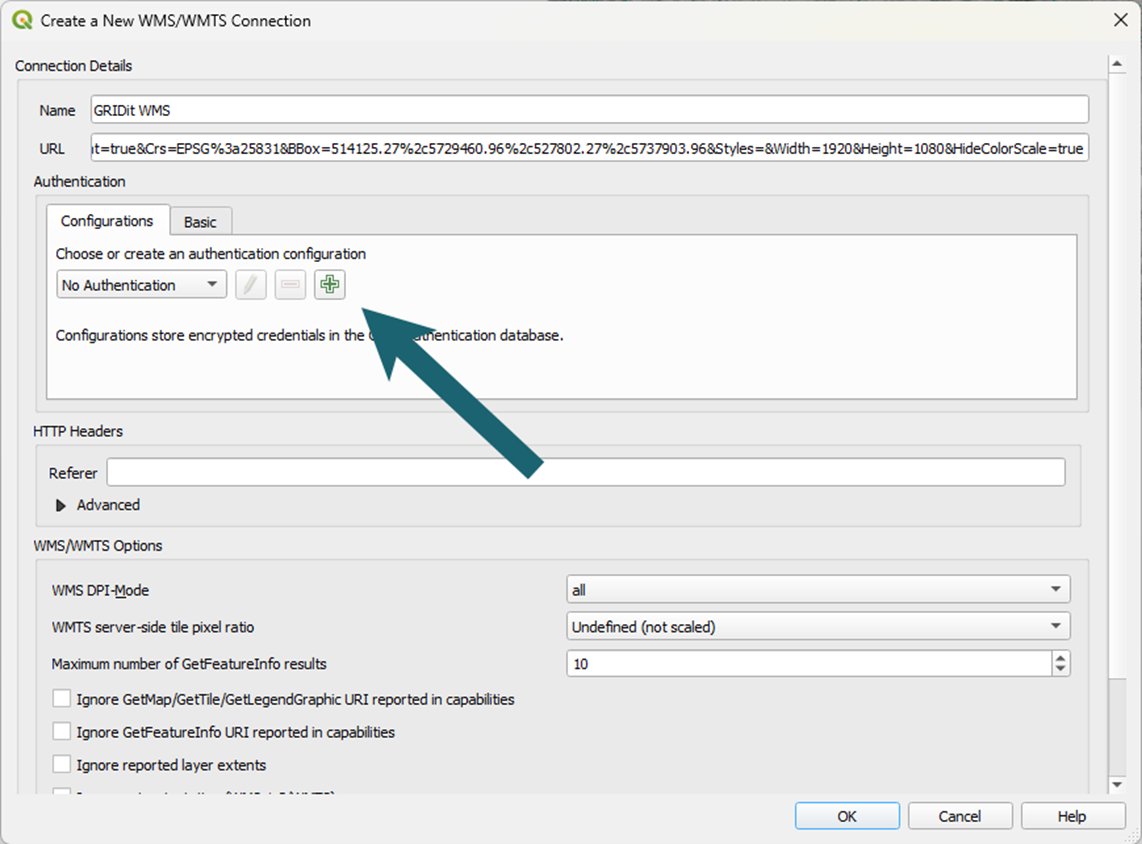
4. Create a new connection in QGIS
In QGIS click the **+** to open the authentication:
[](https://wiki.app.gridit.nl/uploads/images/gallery/2026-03/step5.png)
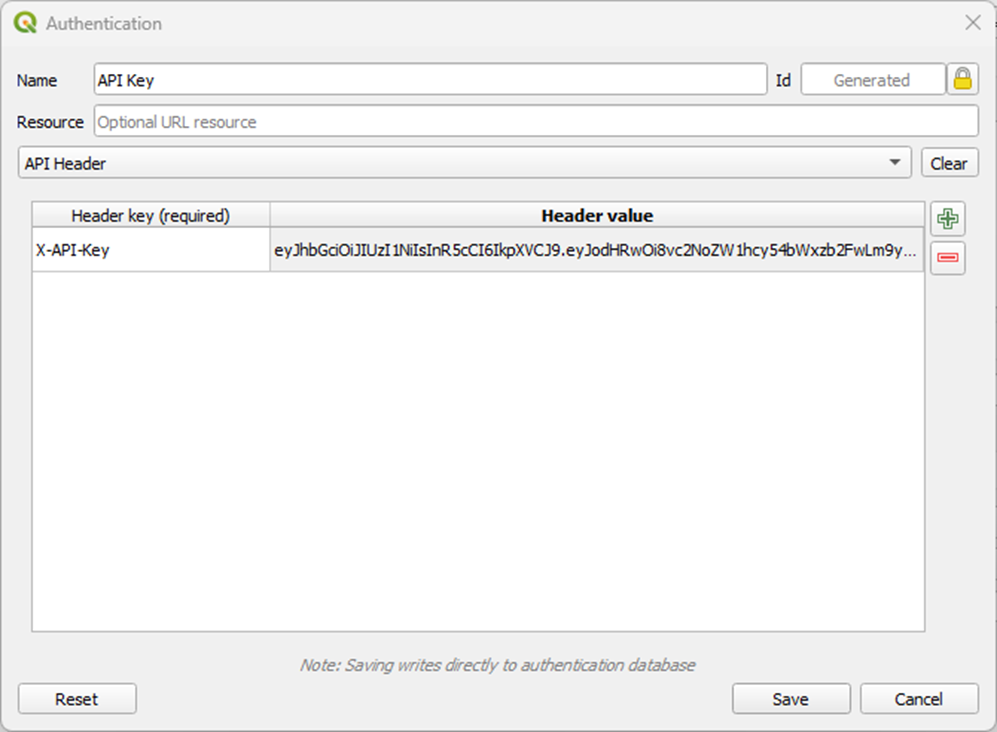
Again click on the **+** and enter the header key (X-API-Key) and the API key itself copied from GRIDit into ‘Header value’:
[](https://wiki.app.gridit.nl/uploads/images/gallery/2026-03/step6.png)
Then click ‘Save’ and in the next screen ‘OK’.
The raster layers should now be available in QGIS.