# Add a Layer
## Adding a new layer
#### The data flow
---
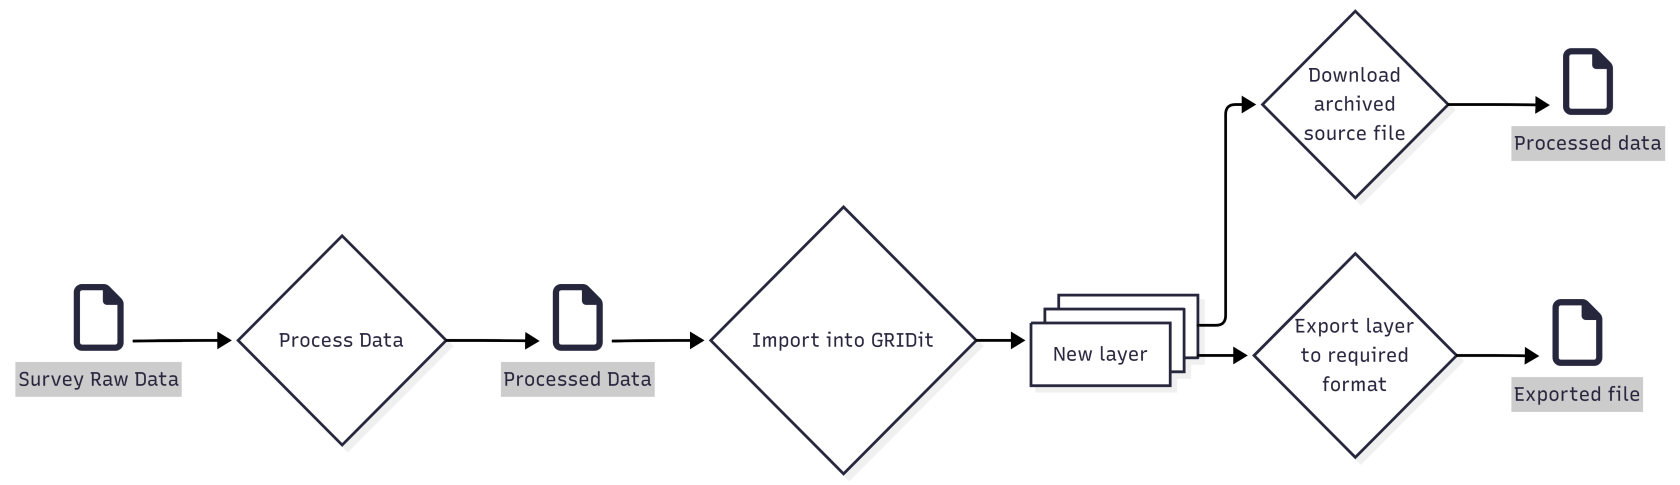
To create a new layer you need to import data (see [below ](#bkmrk-supported-file-forma)for supported formats). The process is as follows:
1. Raw survey data is processed to create a file that's ready for import.
2. The resulting file is imported into GRID*it*, creating a new layer.
3. GRID*it* stores this data and archives the file used to import the data. This archived file can be downloaded at anytime but won't contain any changes made after upload. If you need any changes made to the layer, use the export function.
[](https://wiki.app.gridit.nl/uploads/images/gallery/2026-03/data-flow-mermaid2.png)
#### Supported file formats
---
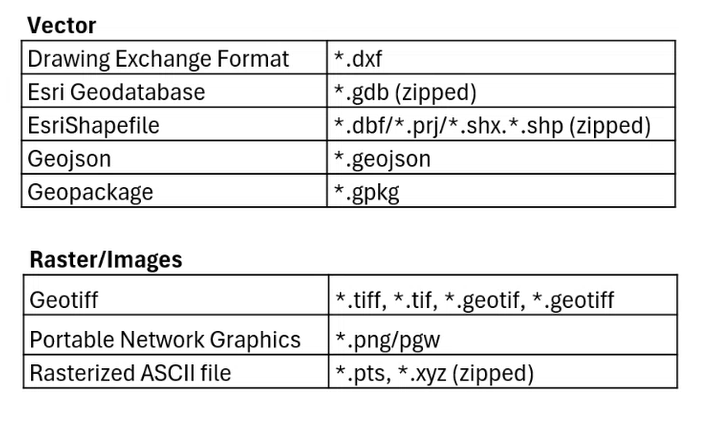
The following file formats are supported:
[](https://wiki.app.gridit.nl/uploads/images/gallery/2026-03/data-types2.png)[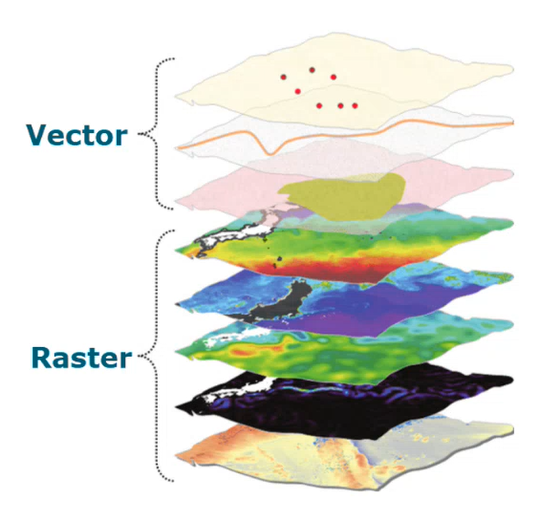](https://wiki.app.gridit.nl/uploads/images/gallery/2026-02/raster-vector.png)
#### How to add a layer
---
There are two ways to add a new layer:
- Drag and drop a file from your explorer on the chart. The ‘upload layer' window will open automatically.
- Click the + button at the top of the layer menu and select ‘add layer'.
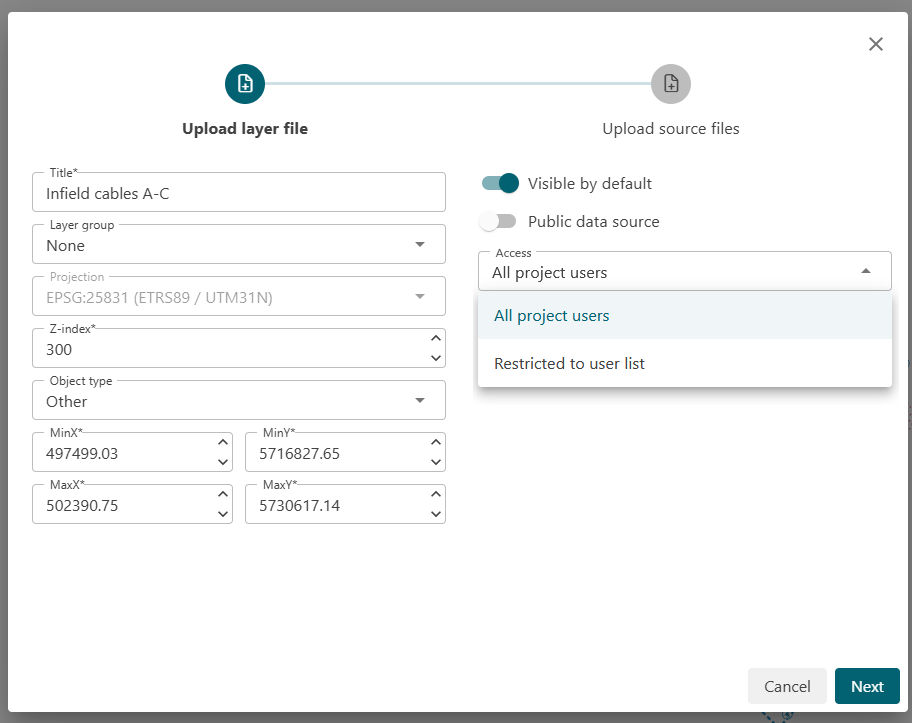
The Upload Layer File window will open automatically (see below).
[](https://wiki.app.gridit.nl/uploads/images/gallery/2026-04/add-a-layer-upload-file-2.png)
GRID*it* will import the data and make it visible in the project . If you would also like to save a copy of the file in its original format for archival purposes, clock ‘upload source files'.
If appropriate, add the file to a layer group and/or select an ‘object type'.
As of 2026.1 release you can restrict access to a layer, this can be set when importing. Please read the [Project & Layer Access Page](https://wiki.app.gridit.nl/books/gridit-user-manual/page/project-and-layer-access "Project and Layer Access") for more details
#### Downloading and archived source file
---
When you create a layer, the file that is used to create the layer is saved to the layer as a "source file". You can download this file at any time.
Downloading a source file that has been archived will not contain any changes that were made to the layer after it was created. If you need the latest data, please use the export function.
#### Exporting a layer
---
In some cases users would like to export a layer to use in another software application. For this you should use the export layer functionality. It's important to differentiate that exporting data is not the same as downloading an archived source file that is stored within a layer. For more information see the [Export layer](https://wiki.app.gridit.nl/books/gridit-user-manual/page/export-a-layer "Export layer") page.
Exporting will include any changes made after the layer was created, downloading an archived source file does not.
#### Sharing Layers
---
When GRID*it* users with a ‘reader’ license upload a new layer, it will automatically be set to ‘private'. Only the user themselves can view the layer.
GRID*it* users with ‘admin' or ‘contributor' licenses can share the layers that they upload by toggling the ‘private layer’ slider to the right. The layers will be shared with other users within your project. They will not be visible to anyone outside your project.
#### Editing a Layer
---
Users with a reader license can edit their own private layers. Users with an admin or contributor license can edit all layers. See [Edit Layers](https://wiki.app.gridit.nl/books/gridit-user-manual/page/edit-a-layer "Edit a layer") page for details.