Introduction
Welcome to the GRIDit User Manual. This guide provides step-by-step instructions to help you navigate and make the most of the GRIDit platform.
Welcome
What is GRIDit?
GRIDit is an interactive web-based platform designed to manage and visualize (subsea) asset data. It allows users to analyze, visualize, and report on various datasets, combining project-specific and publicly available data into a single source of truth.
Who is this guide for?
This manual is intended for all GRIDit users, including:
- New users who need guidance on getting started.
- Project managers looking to manage and analyze asset-related data in a GRIDit project.
- Technical users who require advanced functionalities.
What You’ll Find in This Guide
Getting Started – How to log in, navigate the interface, and configure basic settings.
Working with Data – Uploading, managing, and visualizing datasets.
Analysis & Reporting – Using tools to generate insights and export reports.
Collaboration – Sharing data with stakeholders and managing user access.
Customization – Adjusting settings and workflows to fit your needs.
Need Help?
If you have any questions or need further assistance, feel free to contact our support team at support@gridit.nl.
Logging In
Overview
There are two ways to log in to GRIDit:
- By using your Microsoft Account via Single Sign-On (preferred)
- Email address and password combination (if you don't have a Microsoft Account)
Microsoft Account (Single Sign-On)
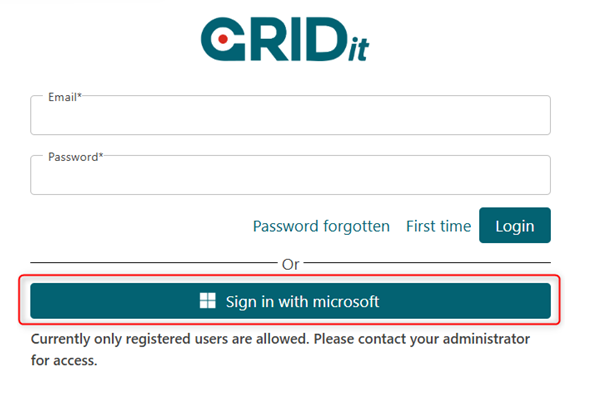
From the login page, click 'Sign in with Microsoft''.
Logging in for the first time
When logging to GRIDit for the first time with Microsoft Authenticator, you are likely to see the following screen.
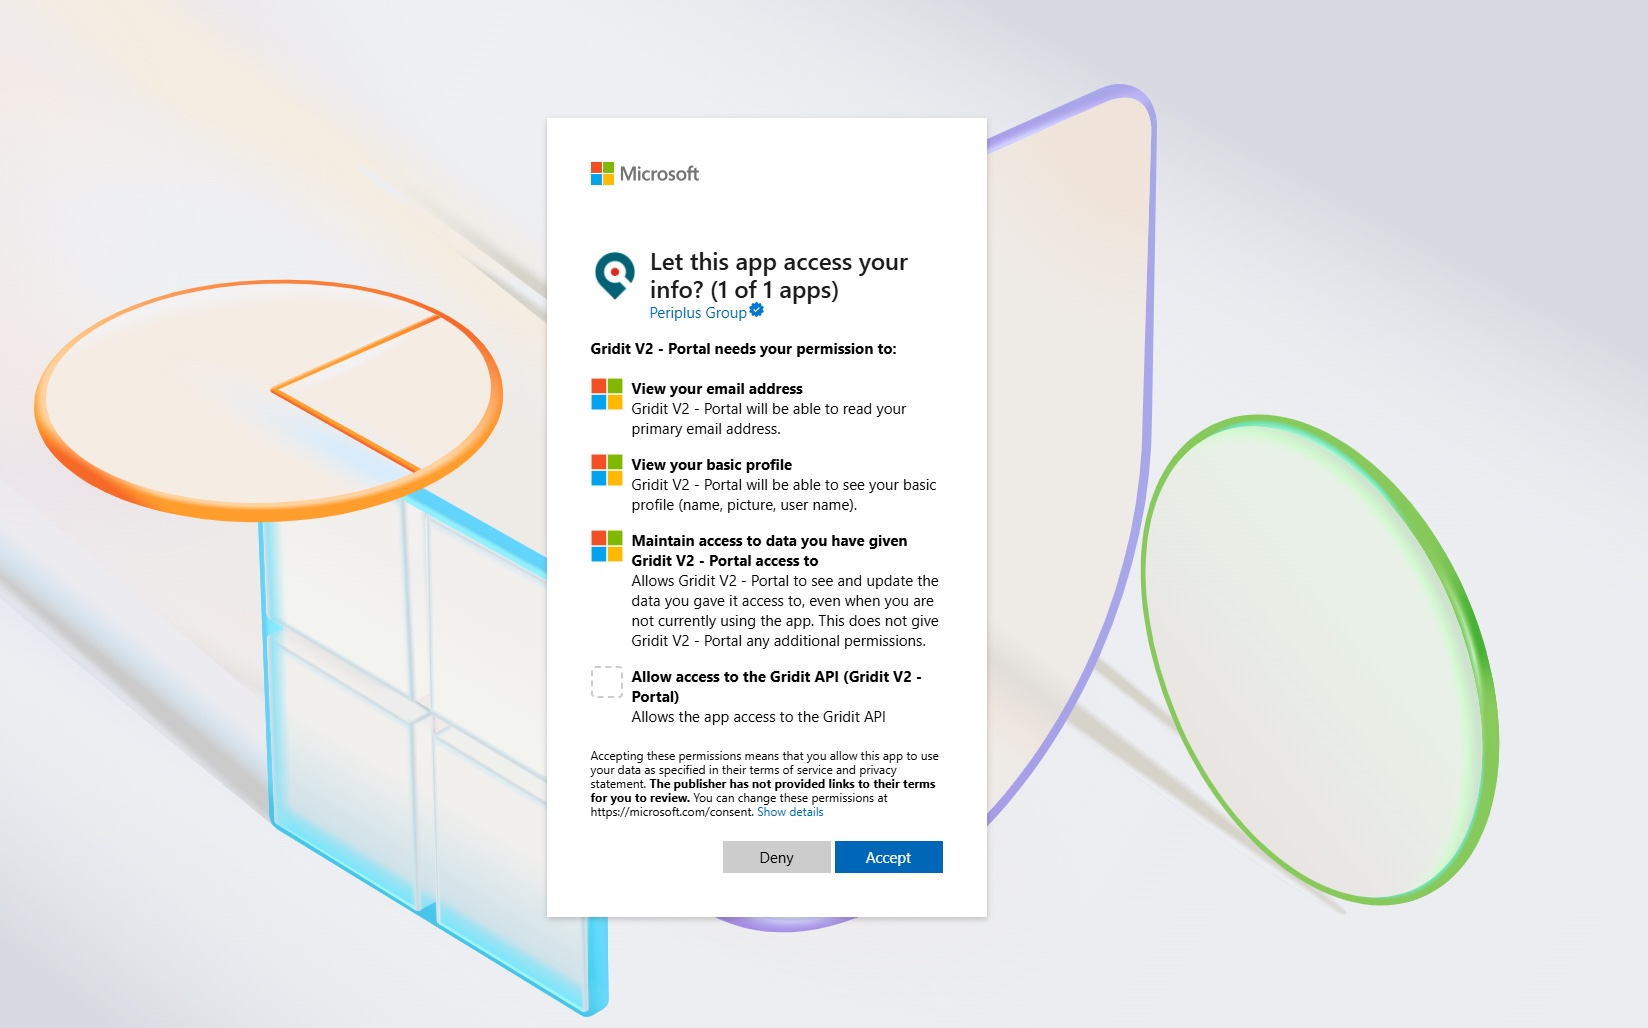
Click ‘accept' to activate authentication for GRIDit.
If you work for a large organization, your company's IT team may need to approve GRIDit's application registration. They will need the following information:
- Display name: Gridit V2 - Portal
- Application (client) ID: ac7c66ec-0c5f-4ae0-a90b-e71ff3e8387f
Problems logging in with Microsoft Single Sign-on?
If you are experiencing problems please try:
- Clearing your browser's cache or try a different browser.
- Check with your company's IT team and ensure they have enabled GRIDit to use Microsoft SSO for authentication.
- If you are still experiencing problem, please contact our support team at support@gridit.nl.
Future Two-Factor Authentication (2FA) or Multifactor Authentication (MFA) Logins
You will be taken through the standard two-factor or multifactor authentication process as set by your IT team.
Login with User Name and Password Combination
- First time: To create an account with an email address and password combination (see below).
- Email & Password: Use this for future email/password logins.
- Login: Click when user name and password have been entered.
- Password forgotten: To reset your password (see below)
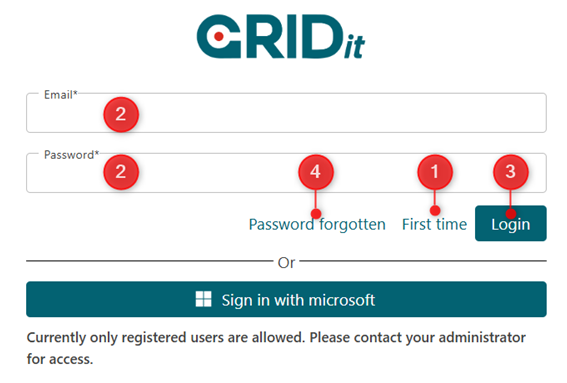
Logging in for the first time
On clicking the ‘First time’ button you will see the following screen. Enter your email address and click 'request token'.
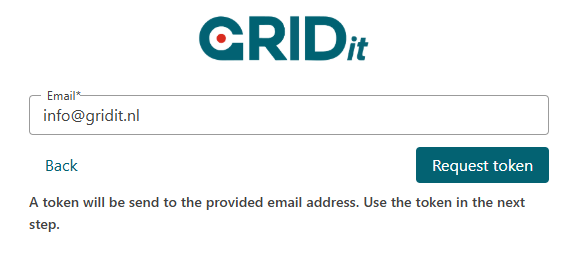
Next, you will see this screen:
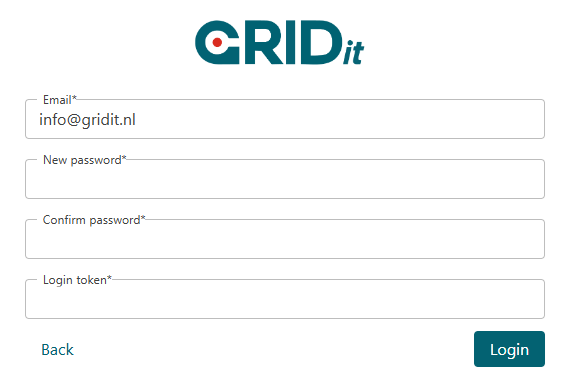
Reset Password
Click the ‘password forgotten’ button on the login screen.
The process is then similar to logging in for the first time (see above).
You will be asked to fill in an email address, to which a token will be sent.
Then fill in your new password and token.
Landing page
Once logged in, the user is presented with an overview of their organization's project to which they have access. Select a project to open it. To configure a user's access, please see Project and Layer Access.
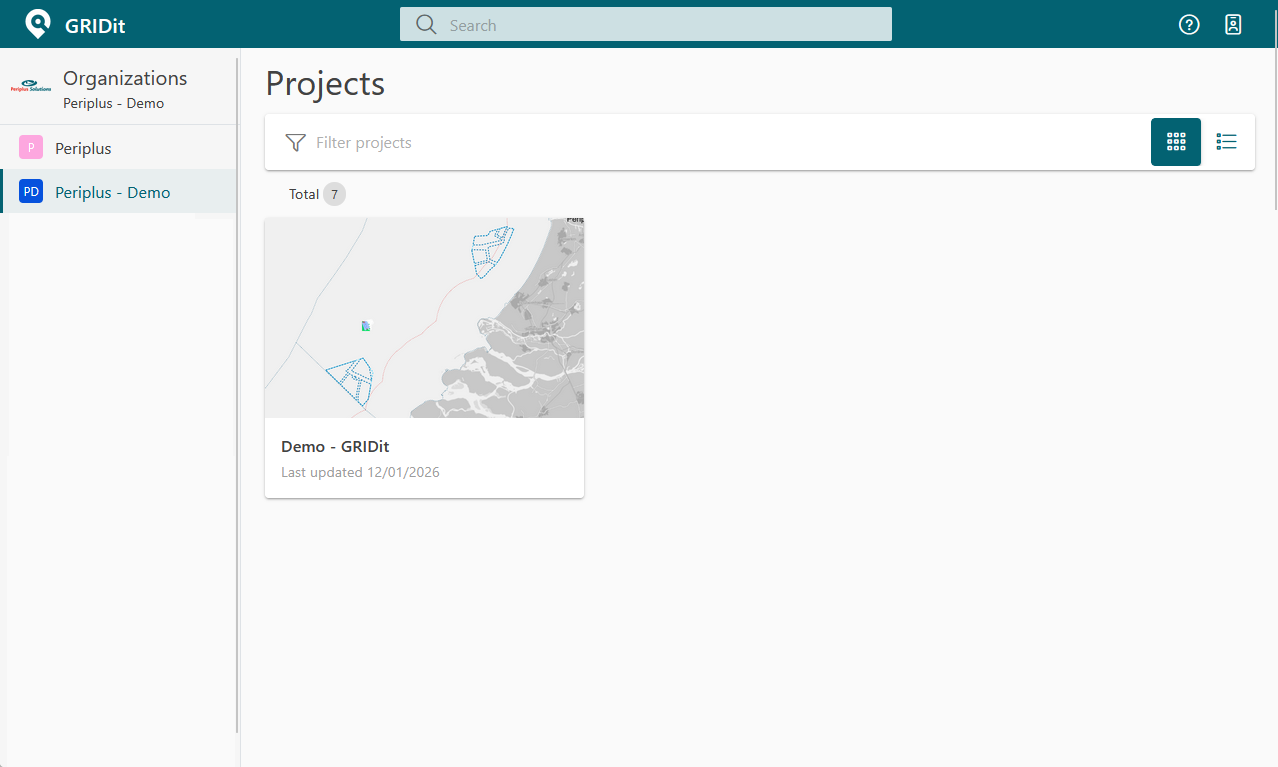
Project View
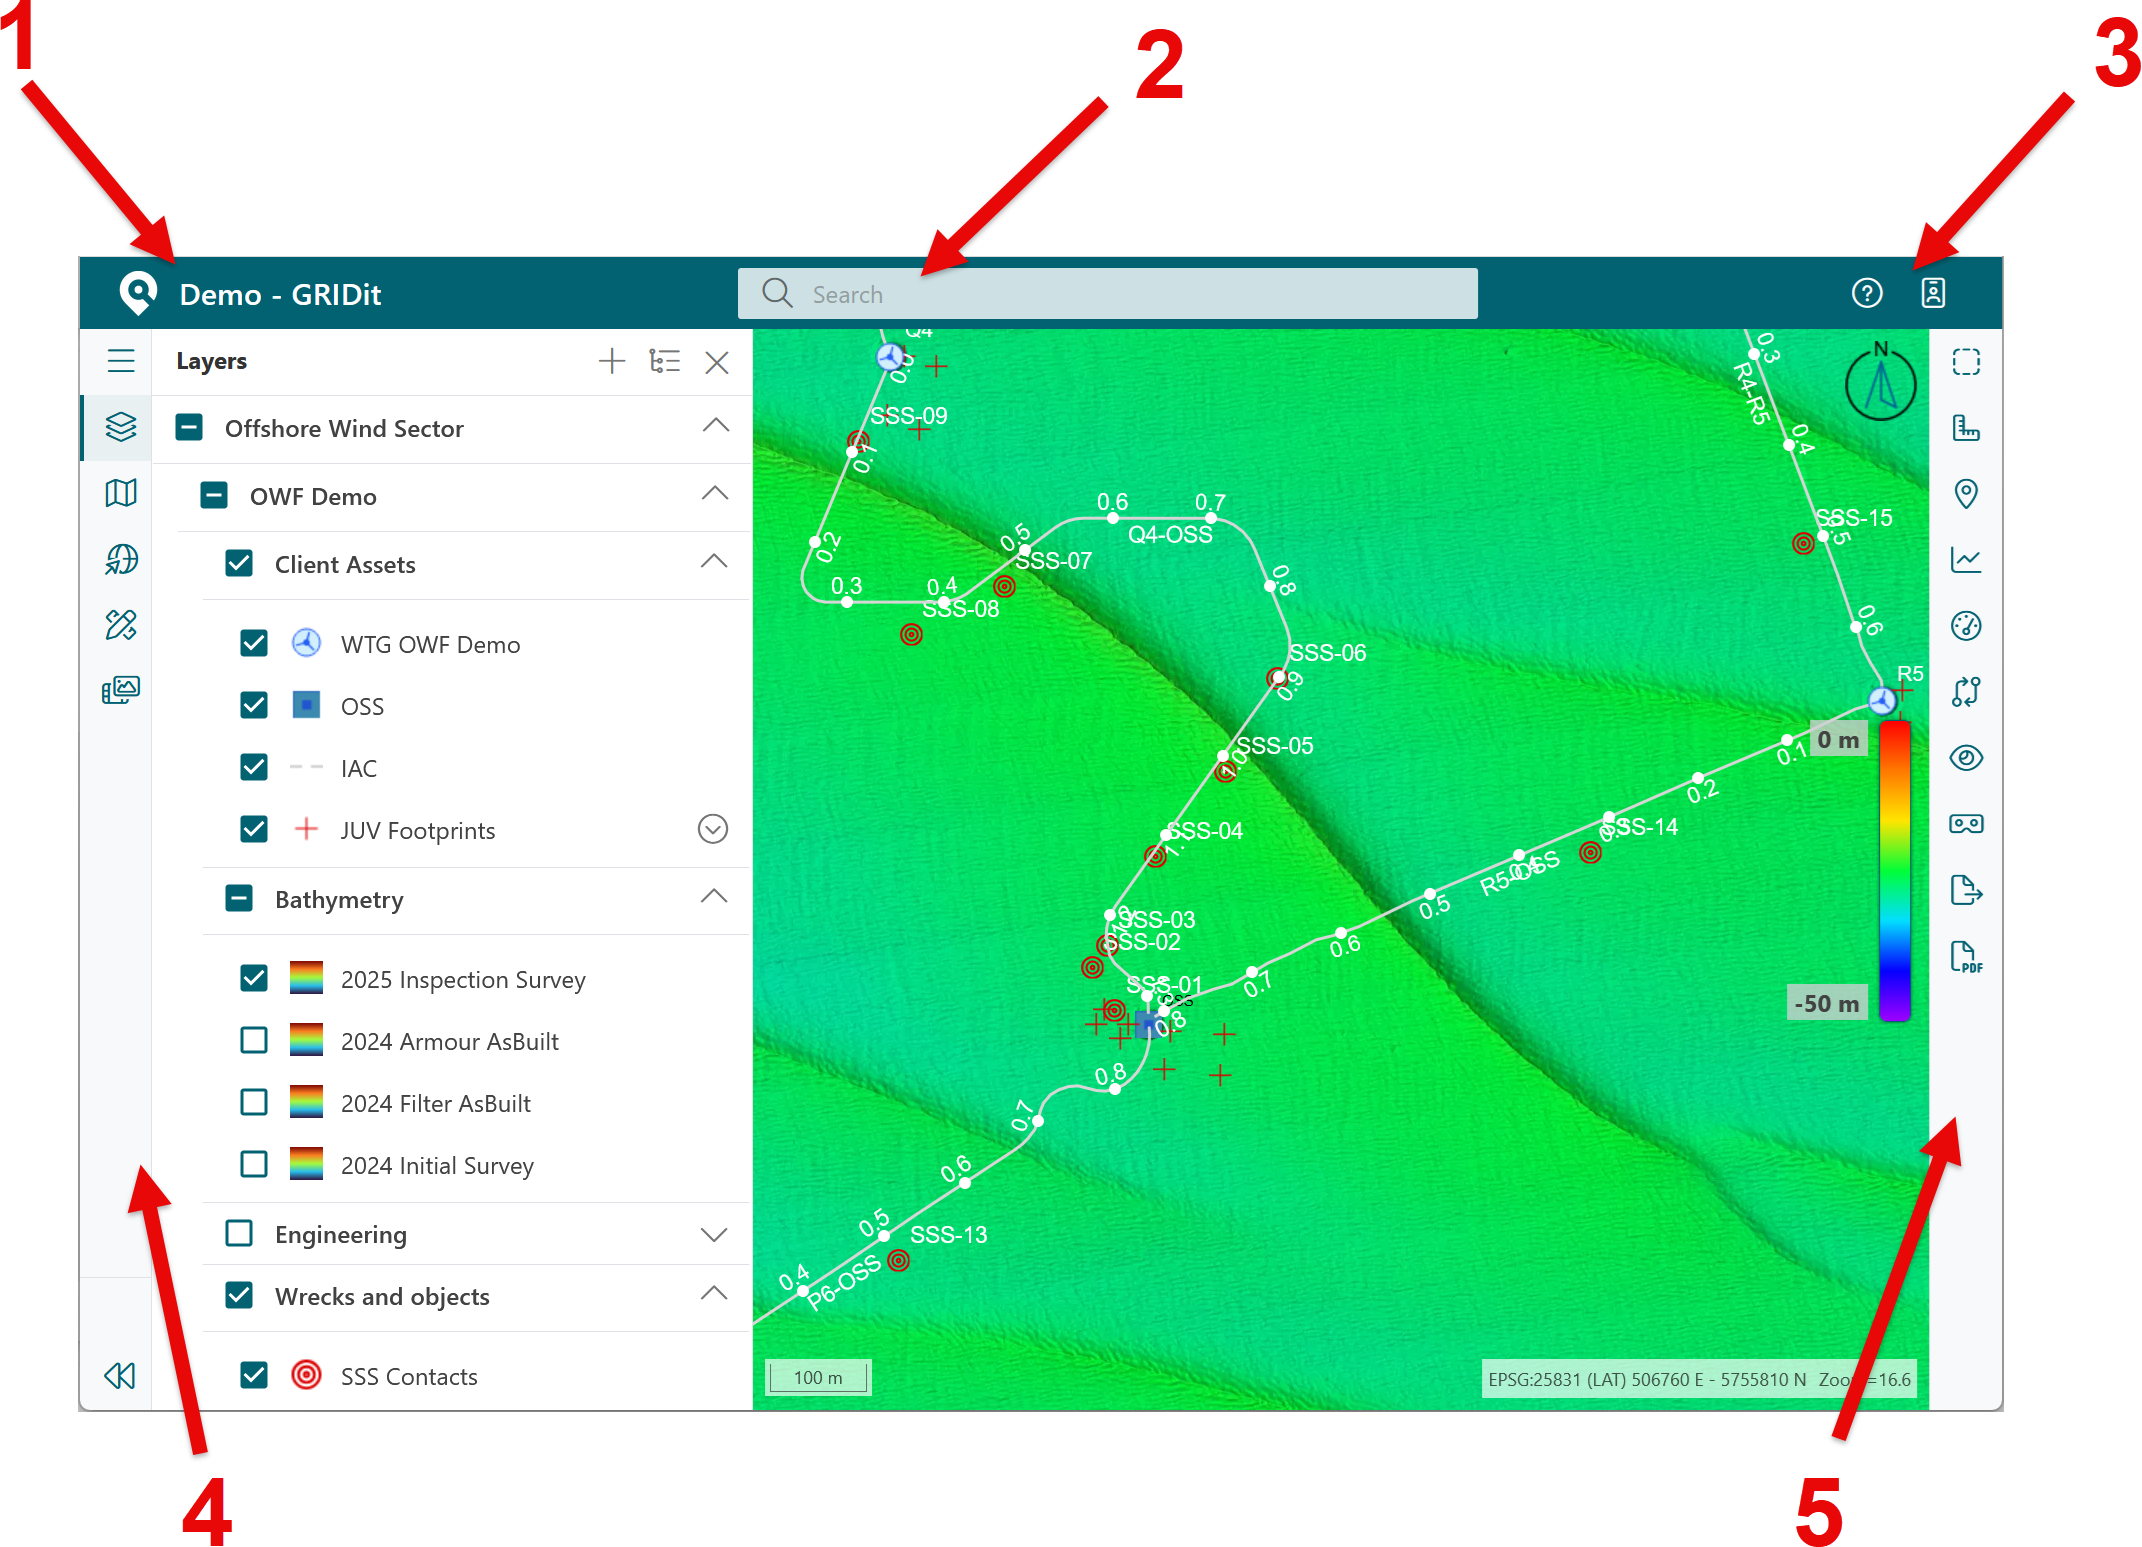
The user interface consists of a few elements
- Project access - select to access other projects in your organization.
- Search Box - user can search for features that have been configured to be searchable.
- Information - access to user manual and user profile.
- Left sidebar - can access various sources of data. The layer manager is selected by default.
- Tools sidebar - access to tools (referred to as the toolbar).
Display Options
Adjust how raster layers such as bathymetry layers are drawn on the map.
Options
| Option | Description |
| Theme | A theme sets the colors used in the scale. All raster layers are visualized using the same theme. Default themes are available but specific themes can be shared between organizations, project or for personal use. A user can select the available theme from the drop-down list. The theme can be modified in a separate dialogue. See Manage Themes. |
| Color scale |
Fixed
|
| Time slider | A bathymetry layer can have multiple versions from different dates. The (optional) slider selects a version based on the date of the file version. |
Release Announcements
All new releases are announced here.
GRIDit 2026.1
- Available: 21 May 2026
- Layer access can be restricted per layer. See documentation
- Added volume calculation tool
- Renamed waypoint tool to "Markers"
- Improved performance of raster layers (display each tile as soon as available)
- New user manual + improved documentation
- Added Uploaded by field to files
- Added basic authentication for WMS/WFS APIs (for ArcGIS)
- Minor improvement to contour lines
- Bug fixes + minor improvements
Previous Releases
GRIDit 2025.3
- Monopile profile tool renamed to cable protection system (CPS) profile tool
- Added tool to export multiple layers
- Added support to import the following file types:
- Geopackage (one feature data set only)
- ESRI File Geodatabase (one feature data set only
- Compressed xyz files (.zip)
- Project's vertical reference system is visible to user and can be set by contributors and admins
- Radial profile tool: added a rotation offset to the tool and monopile heartline to the depth profile
- Added information field to layers (editable with markdown), all users can view a layer's information
- Reordered the tool buttons for easier user navigation
- Improved polyline visualization with a highlight
GRIDit 2025.1
- Added Radial Profile tool
- Added Burial Assessment Difference to Burial Assessment tool
- Calculate raster tool to calculate the difference between two raster layers
- Added support to import the following file types:
- Shapefiles (zipped shp / .dbf / .shx / .prj files).
- xyz files (.pts / .txt / .xyz files)
- 3D visualization of a Cloud Optimized Pointcloud
- Improved user interface layout
- Map Profile tool - create multiple profiles at once
- Depth profiles can now be generated for any line the user draws
- Data portal proof of concept
- Store media file in GRIDit and link to a feature (note: this will use up much of the free storage quota. Above 5GB for all projects is paid)
- Editing and deleting attributes in feature table is possible (if user has access)
- Styles can be re-used across multiple layers (user can copy paste style)
- Layer styles can be imported and exported
- Vector features can be clustered to reduce clutter